
Making this Red velvet cake bite recipe at home is easier than many people think. This cake has a soft texture, rich flavor, and a beautiful red color that looks very special when finished with smooth cream cheese frosting. The sponge is light and moist, and the frosting adds a slightly sweet and creamy taste that makes every bite delicious.
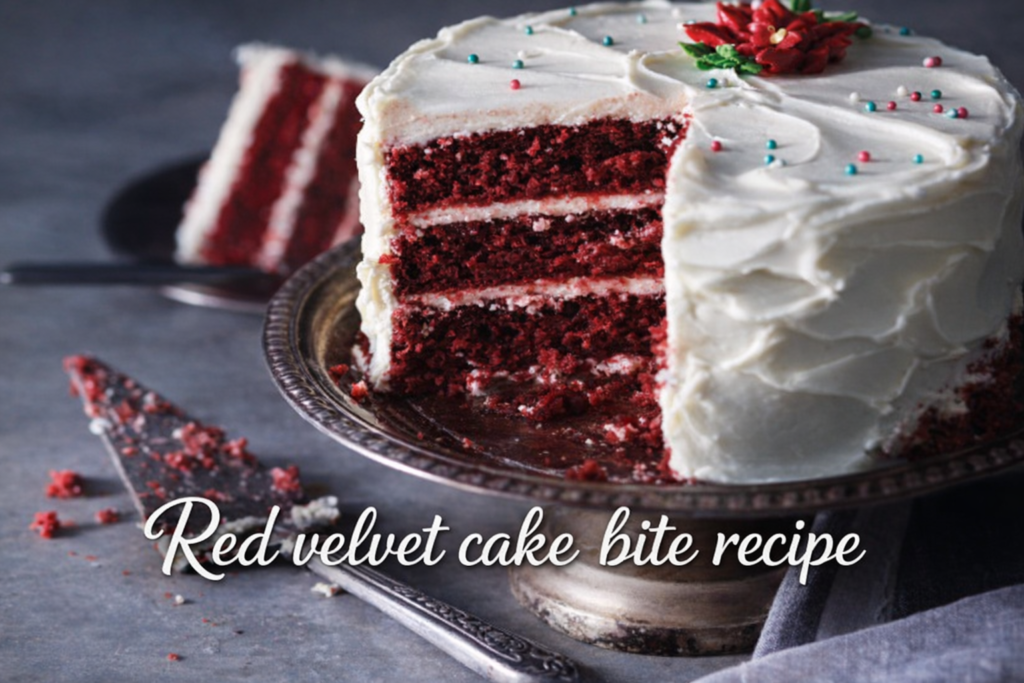
This Red velvet cake bite recipe is perfect when you need a beautiful red cake for special days like birthdays, holidays, or any celebration. The cake has a rich buttery taste with a light cocoa flavor and a soft texture that makes every bite smooth and enjoyable. It is not just a red-colored vanilla cake, but a well-balanced cake with a slightly tangy and sweet flavor that makes it different from other cakes.
Red velvet cake became popular many years ago when red food coloring started to be used in baking, and since then it has become one of the most loved cakes in many homes. Because of its soft crumb and creamy frosting, this Red velvet cake bite recipe is often chosen when people want a cake that looks special and tastes rich at the same time.
Making this cake from scratch gives a much better result than using ready mixes. The layers bake soft but still moist, and the texture stays smooth after frosting. When you prepare this Red velvet cake bite recipe, the final cake looks clean, cuts nicely, and is perfect for serving as slices or small cake bites for guests.
WHAT YOU NEED TO MAKE THIS RECIPE
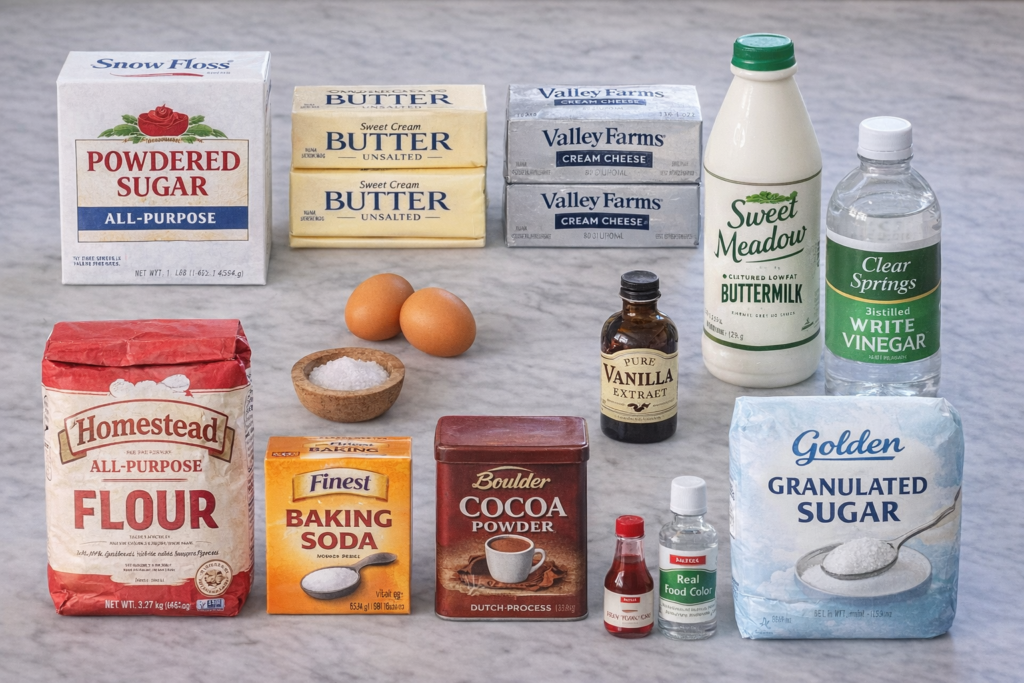
Cocoa powder — A small amount of cocoa powder is used in this recipe to give a mild chocolate flavor without making the cake too strong. Always use natural cocoa powder instead of Dutch-processed, because it works better with the other ingredients and gives the cake the proper red velvet color.
Baking soda — Always check the baking soda before using to make sure it is still fresh. Expired baking soda may not work properly and can affect how the cake rises during baking.
Butter — Choose unsalted butter for better control of the flavor. Before using, keep the butter at room temperature until it becomes soft. This makes it easier to cream and helps the cake batter turn smooth and fluffy.
Butter — Choose unsalted butter for better control of the flavor. Before using, keep the butter at room temperature until it becomes soft. This makes it easier to cream and helps the cake batter turn smooth and fluffy.
Buttermilk — Buttermilk makes the cake tender and slightly tangy while keeping it moist. It also helps the baking soda work better, so the cake becomes light and fluffy. Since buttermilk is acidic, it reacts with the cocoa powder during mixing and helps produce the traditional red velvet color.
Vinegar — A small amount of vinegar is added to help the baking soda work properly, which makes the cake rise better. Like buttermilk, vinegar is slightly acidic and helps bring out the red color when it reacts with the cocoa powder.
Red food coloring — this will help enhance the red tones in the red velvet cake.
Cream cheese — Use full-fat block cream cheese for the frosting, not the spreadable type that comes in a tub. Block cream cheese is thicker and gives a smooth, firm frosting. Good quality cream cheese works best, because some cheaper brands can be too soft and may make the frosting runny.
Powdered sugar — Powdered sugar gives the frosting a smooth and sweet texture because it dissolves fast. You can also use regular sugar if you grind it well, but powdered sugar gives a better result.
HOW TO MAKE RED VELVET CAKE
Step 1 – Mix dry ingredients
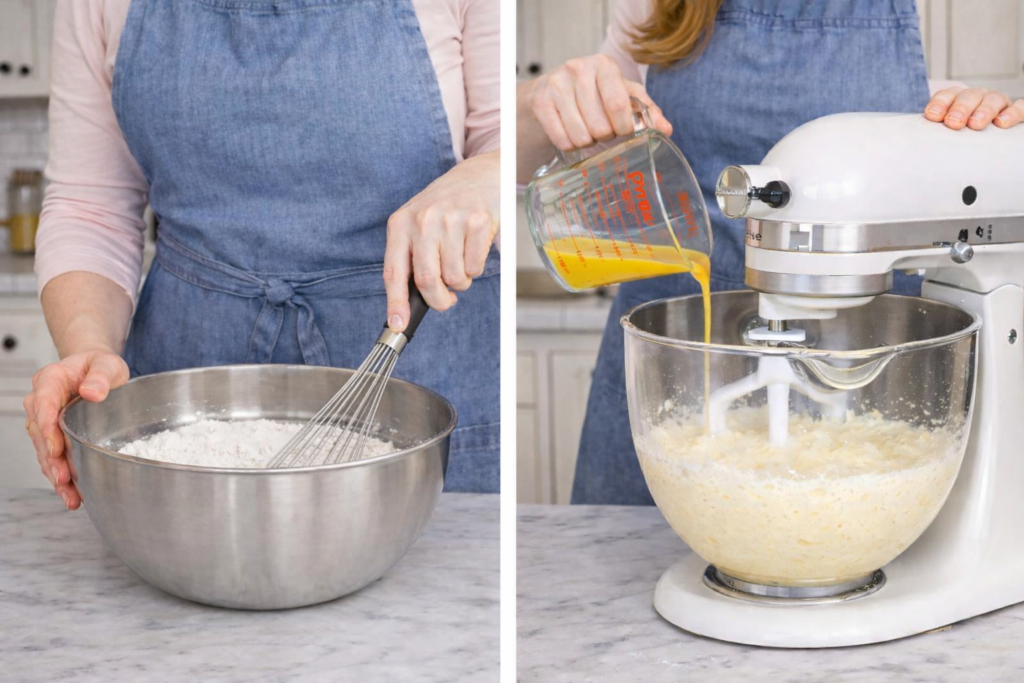
In a medium bowl, sift together the flour, salt, and baking soda. Mixing the dry ingredients first helps the cake batter stay smooth and makes sure everything is evenly combined.
Step 2 – Cream butter and sugar
In a stand mixer bowl, beat the butter on medium speed until soft. Add the sugar and continue mixing until the texture becomes light and fluffy. Add the eggs one at a time, mixing well after each egg so the batter stays smooth and creamy.
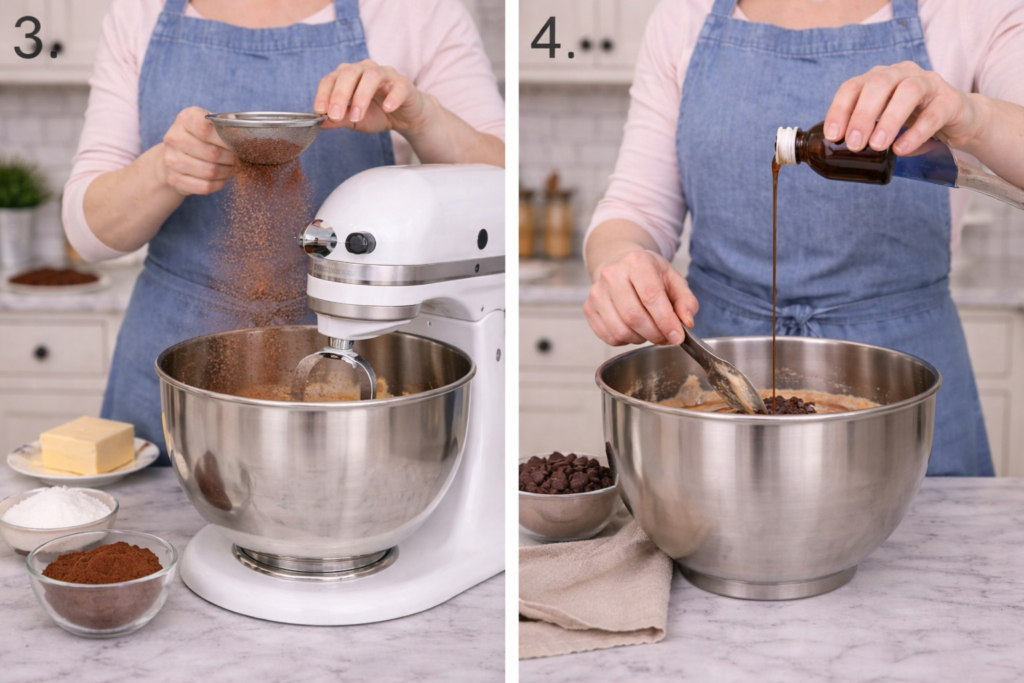
Add the vanilla extract to the butter mixture and mix until fully incorporated. Next, sift the cocoa powder directly into the bowl to avoid lumps and ensure a smooth texture. Beat the mixture on low speed just until everything is combined. Finally, use a spatula to scrape down the sides of the bowl to make sure all ingredients are evenly mixed.
For this Red Velvet Cake Bite Recipe, start by pouring the buttermilk into a measuring cup. Then add the vinegar and red food coloring, and give it a gentle stir until everything is well combined. If you prefer a richer, brighter red color in your cake, feel free to add a little more food coloring.
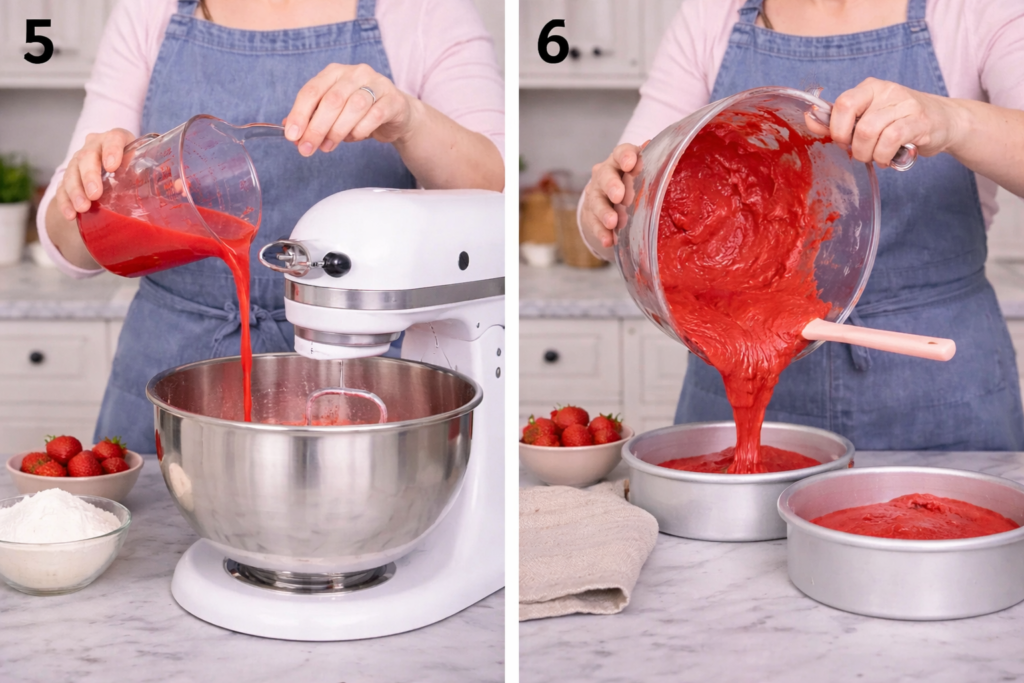
For this Red Velvet Cake Bite Recipe, keep the mixer on low speed and add half of the flour mixture into the bowl. Then pour in half of the buttermilk mixture and mix gently until just combined. Repeat the same process with the remaining flour and buttermilk. Don’t forget to pause and scrape down the sides of the bowl occasionally to make sure everything is evenly mixed.
For this Red Velvet Cake Bite Recipe, evenly divide the batter between three greased 6-inch cake pans. Place them in the oven and bake for about 35–40 minutes, or until the centers feel soft and spring back lightly when touched. This ensures your cake layers are perfectly baked and ready for the next step.
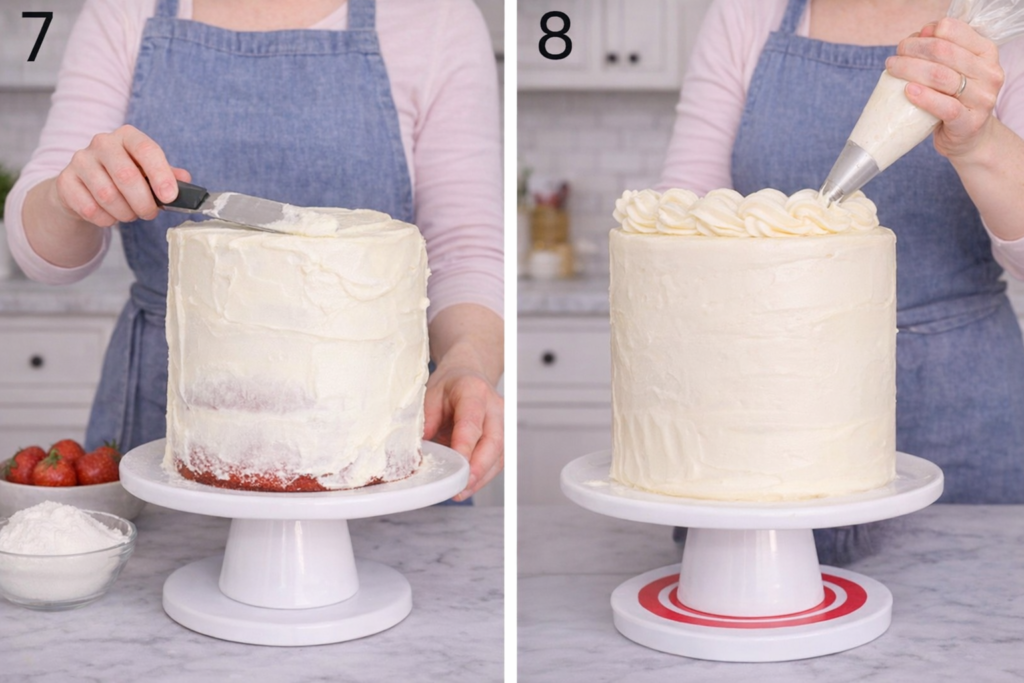
For this Red Velvet Cake Bite Recipe, start by beating the butter, cream cheese, vanilla, and a pinch of salt together until the mixture turns smooth and fluffy. Gradually add the sifted powdered sugar while mixing, and continue beating until everything is well combined and creamy.
Set aside about one cup of frosting for later. Place one cake layer on a stand and spread around ½ cup of frosting evenly on top. Repeat the process with the remaining layers, then use the rest of the frosting to cover the outside of the cake for a smooth, beautiful finish.
For this Red Velvet Cake Bite Recipe, transfer the reserved frosting into a piping bag fitted with a decorative tip. Pipe a beautiful border on top of the cake or decorate it however you like. Once done, place the cake in the refrigerator and let it chill for about 1 hour, or until the frosting is firm and set.
professional Tips for the Perfect Results
For the best outcome with this Red Velvet Cake Bite Recipe, keep these simple tips in mind:
- Use room temperature ingredients – Butter, eggs, and cream cheese mix more smoothly and create a better texture.
- Don’t overmix the batter – Mix just until combined to keep your cake soft and fluffy.
- Sift dry ingredients – This helps avoid lumps and gives a smooth, even batter.
- Measure accurately – Too much flour can make the cake dense, so use proper measuring techniques.
- Use good-quality cocoa powder – It enhances the flavor and gives a richer taste.
- Adjust food coloring carefully – Add gradually to get your desired red shade without overdoing it.
- Check doneness properly – The cake should spring back lightly when touched or a toothpick should come out clean.
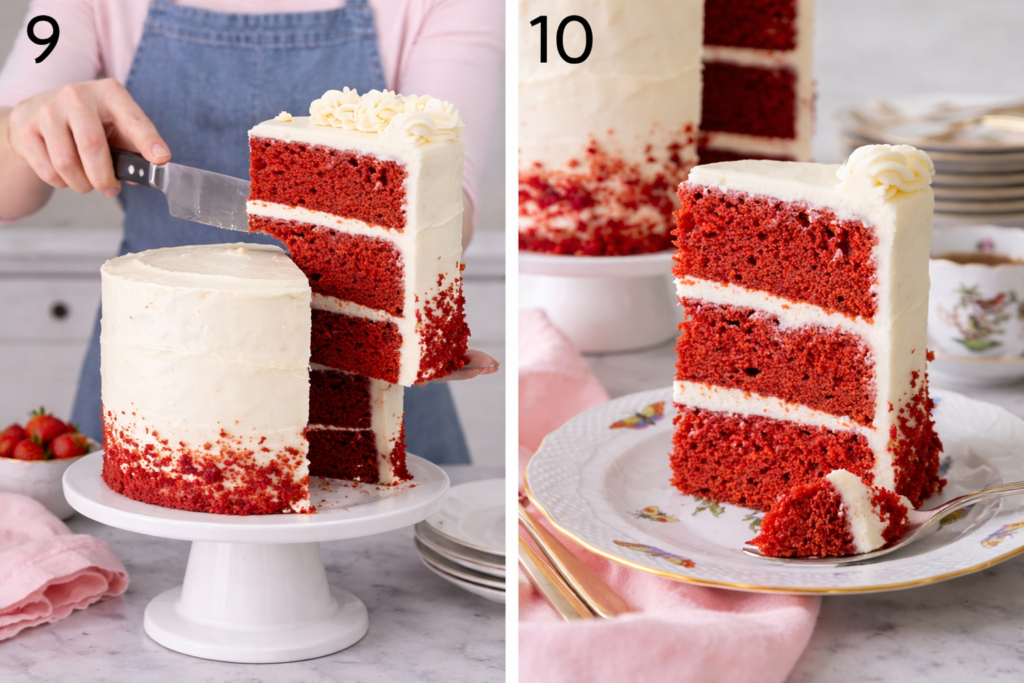
- Chill before slicing – Letting the cake set in the fridge makes it easier to cut clean slices.
CAN I FREEZE THIS CAKE?
Yes! For this Red Velvet Cake Bite Recipe, you can easily freeze the whole cake or even individual slices. Simply wrap the cake or slices tightly in a couple of layers of plastic wrap to keep them fresh, then store them in the freezer for up to 3 months.
When you’re ready to enjoy it, let the cake come back to room temperature before serving for the best taste and texture.
WHAT IS THE ACTUAL FLAVOR OF THIS CAKE?
In this Red Velvet Cake Bite Recipe, the flavor is a unique blend that’s lightly chocolatey with a subtle tangy taste. The cocoa powder gives it a mild chocolate flavor, while the buttermilk and vinegar add a slight tang that makes it different from a regular chocolate cake.
When paired with the rich and creamy cream cheese frosting, the overall taste becomes perfectly balanced—smooth, slightly tangy, and just sweet enough.
I hope you enjoyed making this Red Velvet Cake Bite Recipe as much as I do! It’s a perfect dessert for any occasion—soft, rich, and beautifully balanced with that creamy frosting. Whether you’re baking for family, friends, or just treating yourself, this recipe is sure to impress.
If you try this recipe, don’t forget to share your experience or leave a comment—I’d love to hear how it turned out for you! And stay connected for more delicious recipes, baking tips, and simple cooking ideas.